 “How to make handmade paper” is an experiment. Nevertheless, the experiment is a success and I will be using these sheets for making cards, bookmarks, posters etc in my future DIY’s so stay tuned.
Supplies:
- Tissue Paper
- Watercolour A4 Sheet
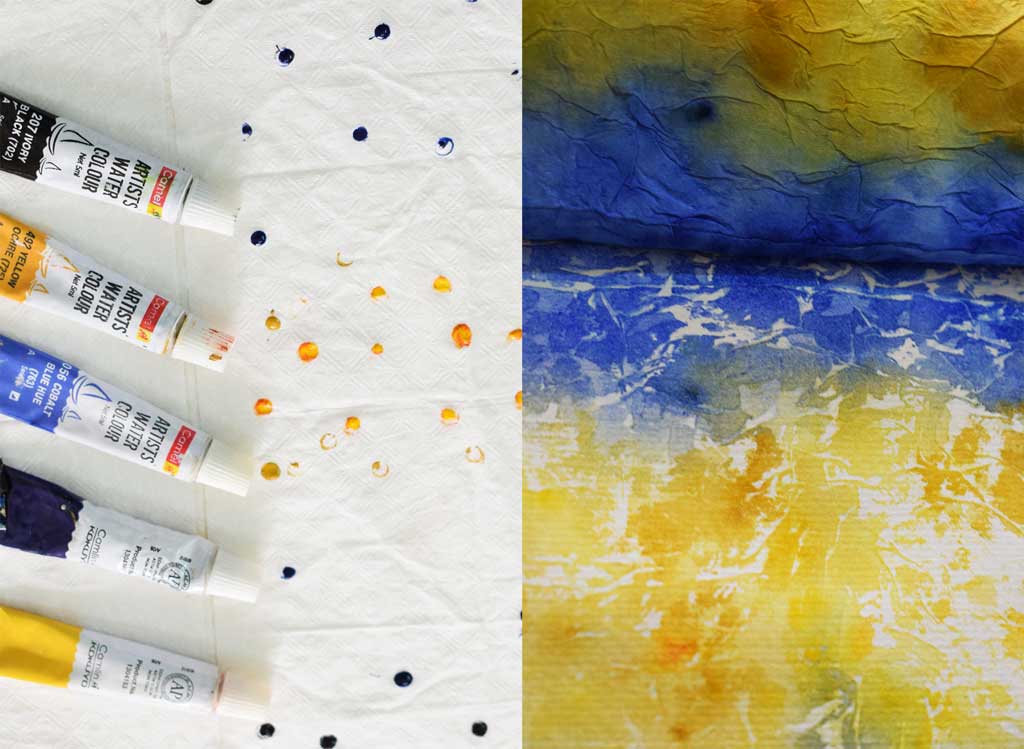
- Watercolour Tubes
- Colour Palette
Process:
1. Take 2 sheets of tissue paper, fold it in half each and place both sheets on either sides of watercolor sheet along with one edge. So that two different watercolor patterns can be achieved.
2. Now select watercolor shades of your choice. If you are confused with the colour sequence then visit adobe color CC website and explore the color sequence how you want your handmade paper to be.
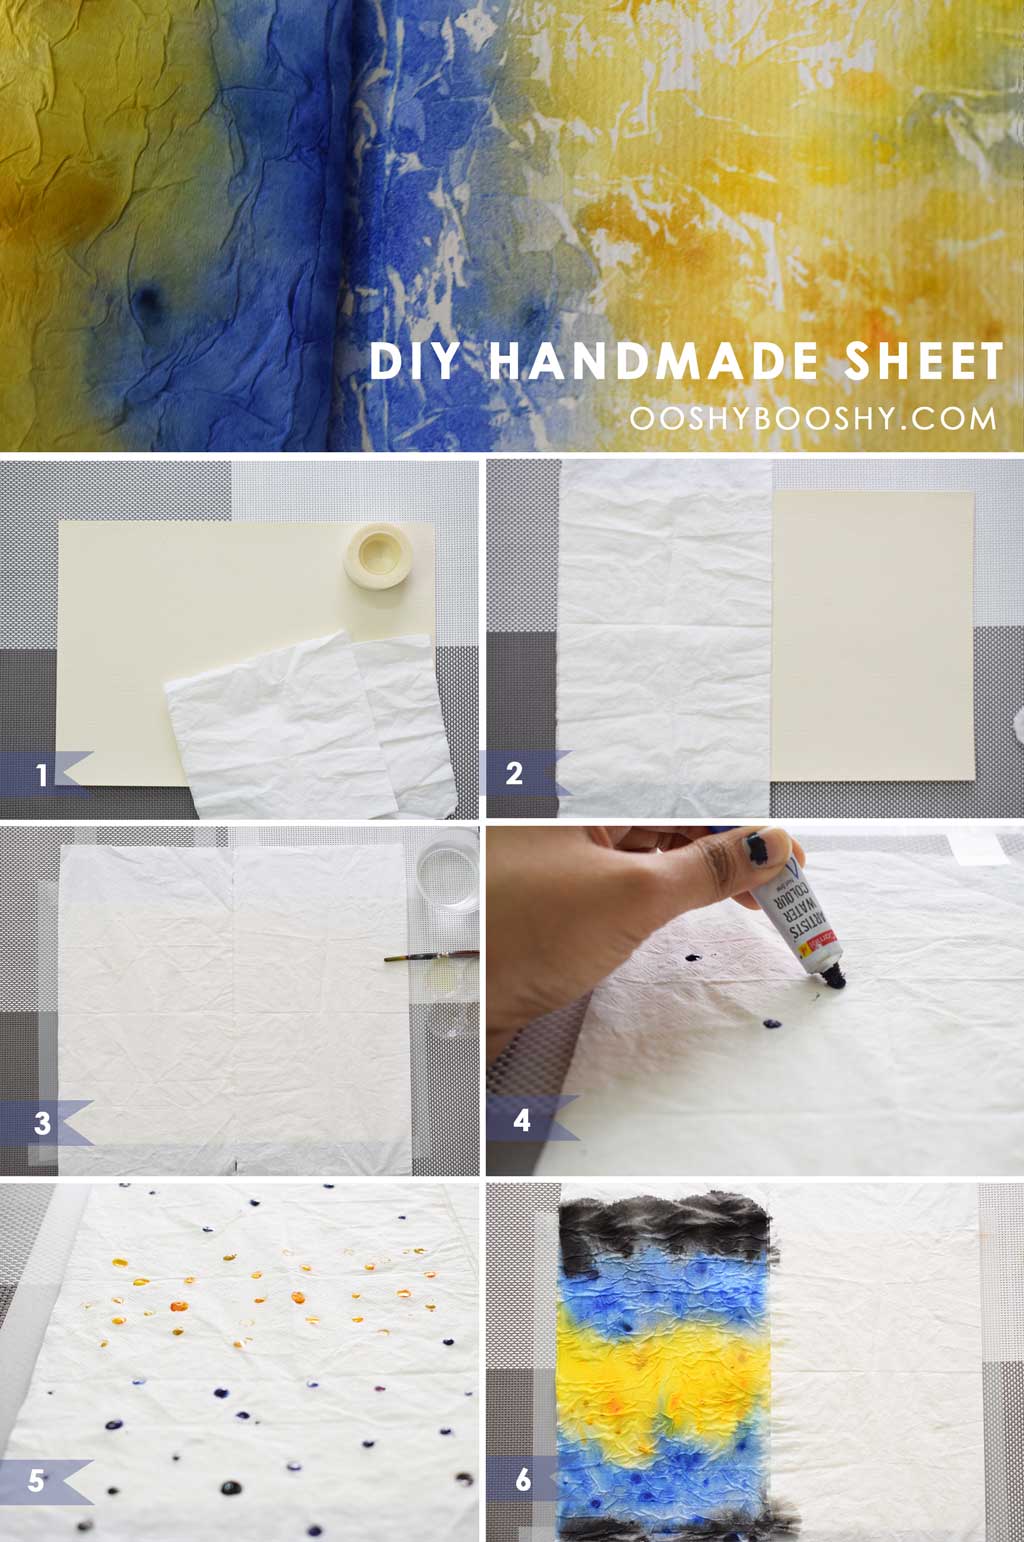
3. After selecting the colour sequence, start squeezing the colour tube of selected colours according to the pattern you have in mind. Here, I used the black colour at the edges leading to the blue colour and then yellow colour at the centre.
4. Once you have applied the pinch of different shades on the tissue paper. Take the same shades on a colour palette and dilute it and then apply it with the help of a brush on the tissue paper.
5. Let it dry completely. The drying process is little slow when it comes to natural drying. I suggest you to use hair dryer to speed up the drying process.
6. Meanwhile, apply the same process to another tissue paper with different colour scheme.
7. The first pattern will be little faded after drying thereby apply second layer of watercolour code.
8. Apply second layer colour code to the other pattern also and let it dry completely.
9. Now, peel off the tissue paper from the sheet carefully.
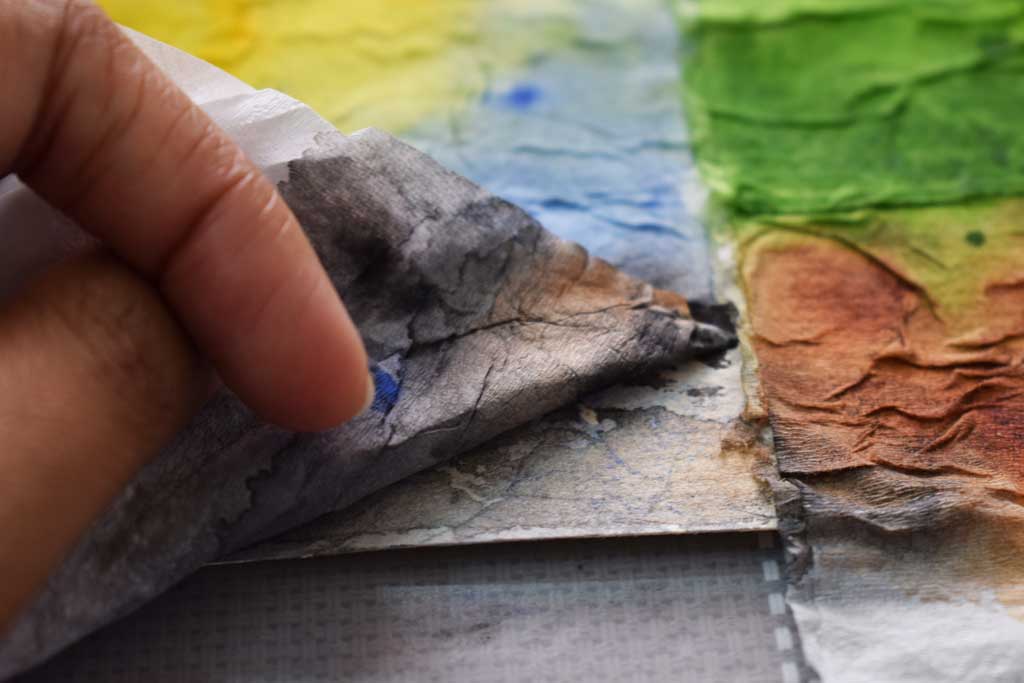
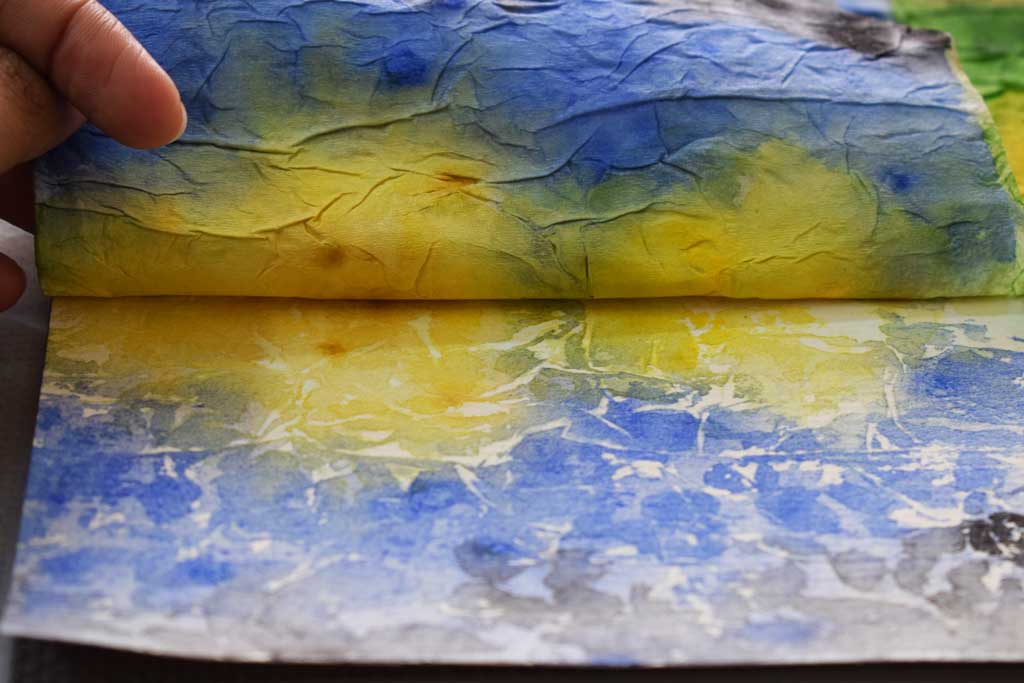
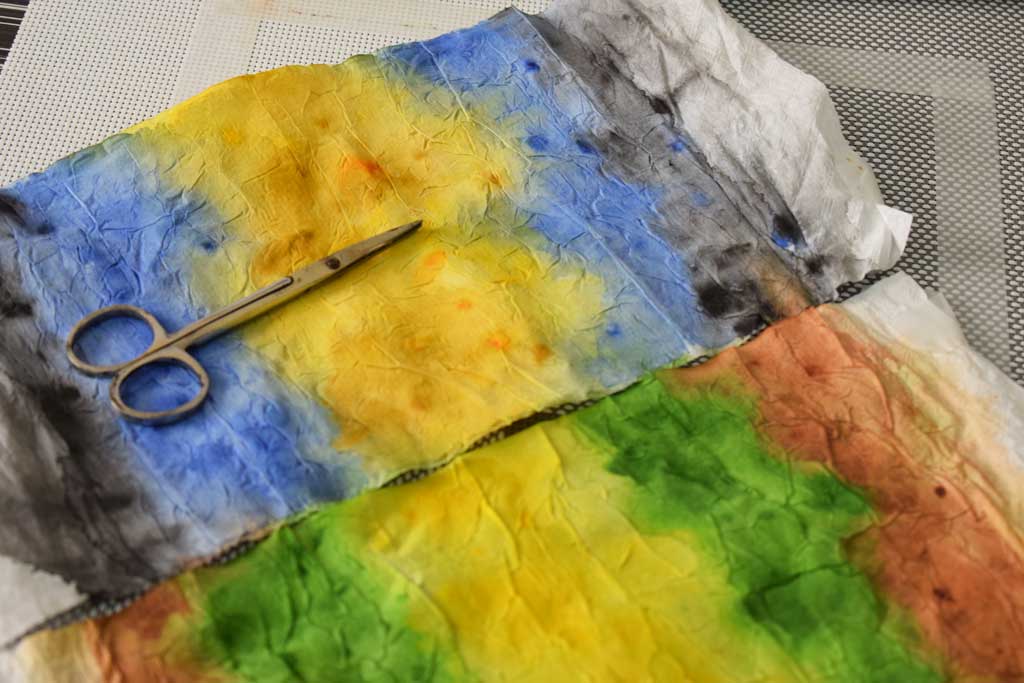
10. Trim the extra edges of the tissue paper and your 2 in 1 handmade sheet is ready.
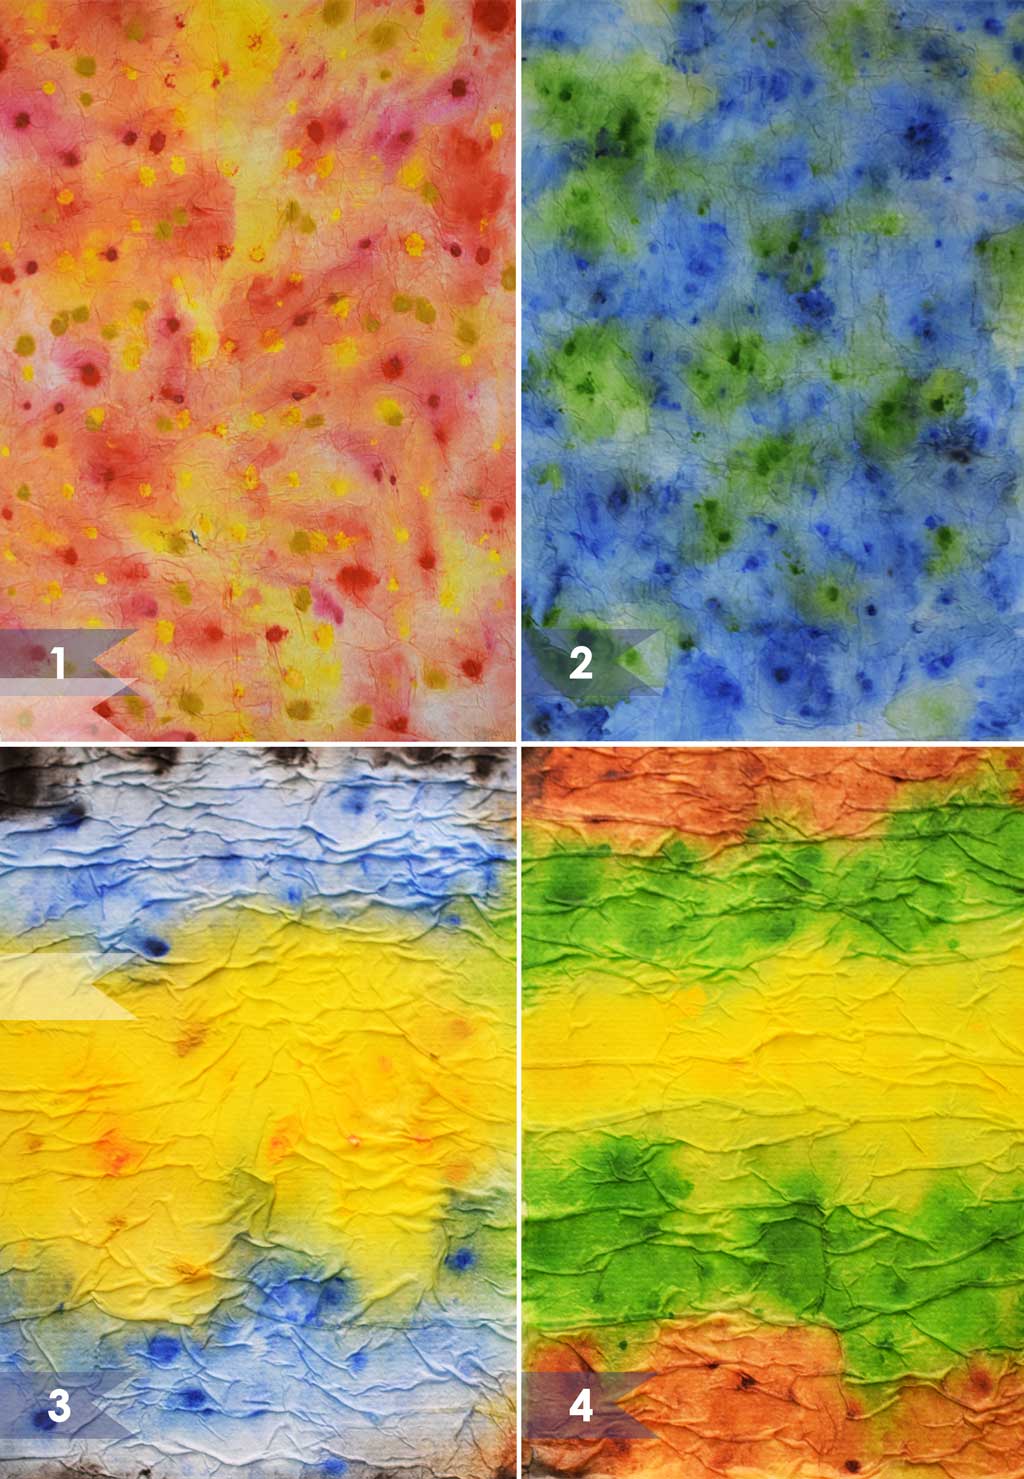
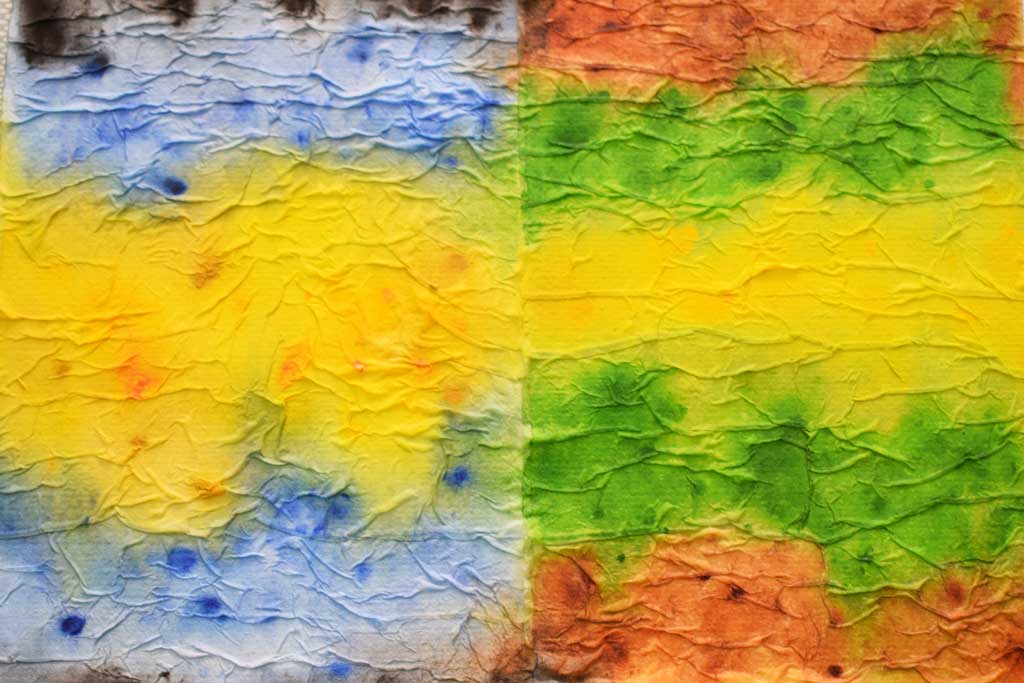
Picture 1, 2,3,4 is the tissue paper which has transformed into a beautiful handmade sheet. The texture of the sheet is depended on the texture and thickness of the tissue paper. You can see the difference between picture 1&2 and 3&4, the tissue paper used for 3&4 is comparatively thicker than the one used in 1&2.
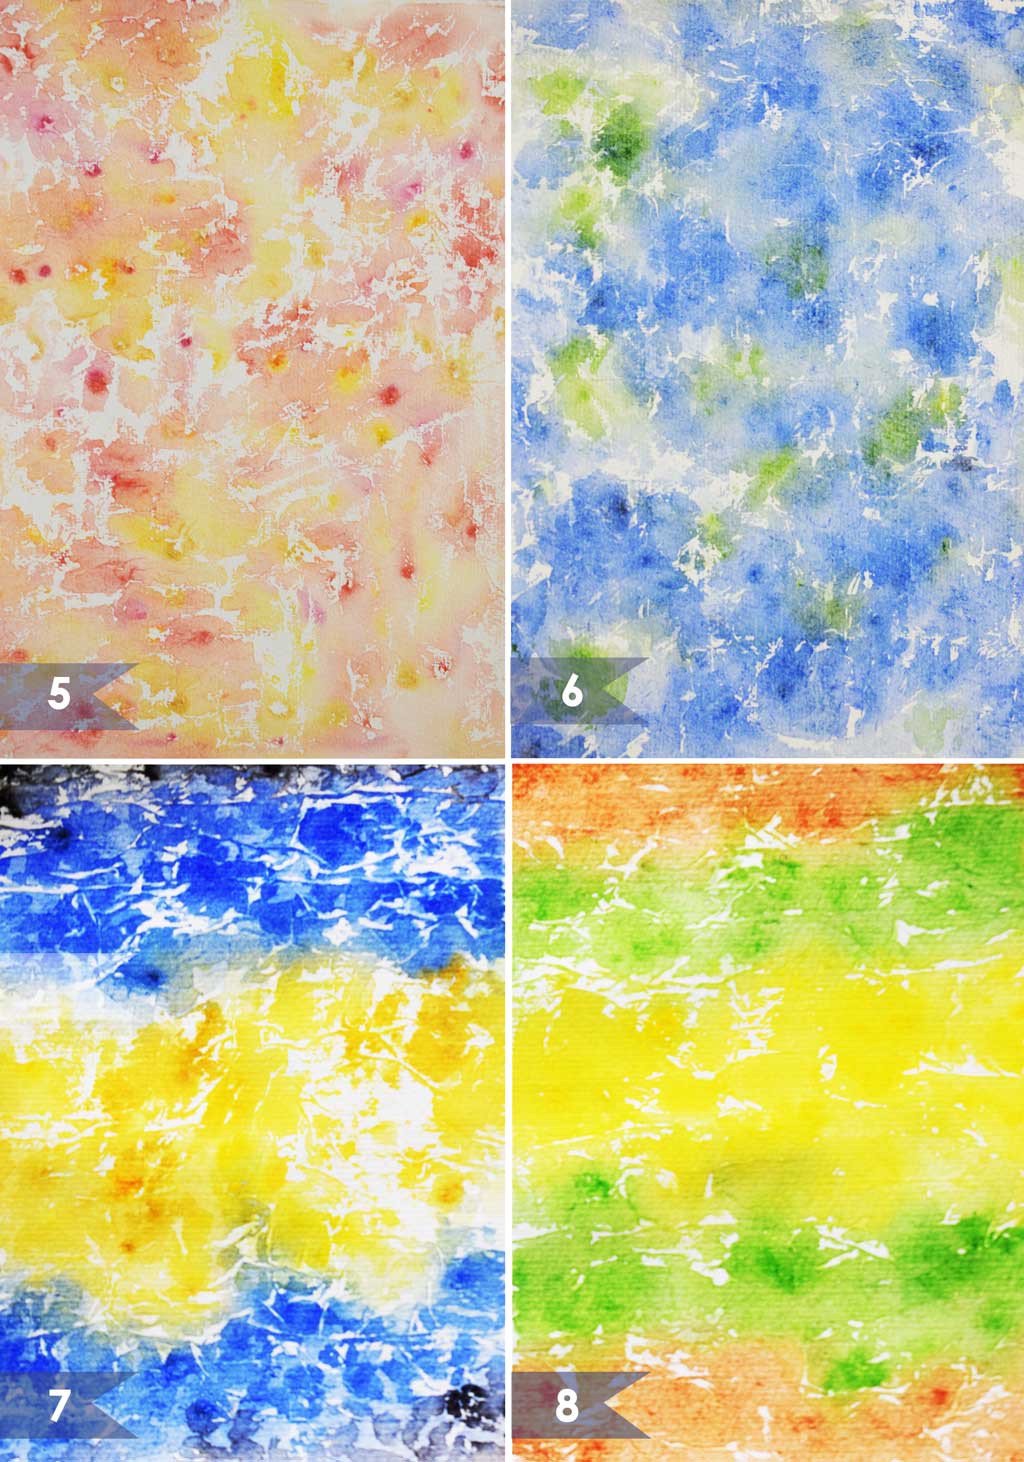
Picture 5,6,7,8 is the watercolour paper which has been placed below the tissue paper. Because of the tissue paper, the paper has attained this beautiful pattern.
If you ask me which one is my favorite, I would say the thinner the tissue paper, the best texture and pattern it will develop.
Which one your favourite, please let me know in comment section below. You can check out more update on my instagram.
Till then HAPPY CRAFTING!! 🙂